Friday, April 3, 2015

Baked Paneer Bhurji


Who doesn't like Paneer. It's a staple choice for most vegetarians and kids. We can't have enough of Paneer dishes in Indian Cooking. You could make them in sweeter creamy gravy like Shahi Paneer, coconut gravy like a korma or spicy Kadai Paneer. This recipe is an easy one requiring very little time and ingredients. Baking makes it very presentable on a dinner table with guests. Also this recipe works well with store bought Paneer like Mother Dairy that gets crumbly.

You need:
250 gms Paneer (grated)
Chopped vegetables of your choice ( Baby corn, capsicum, carrots)
2-3 tomatoes
1 green chilly ( optional)
1 onion finely chopped
Ginger Garlic paste or chopped
Jeera for tempering
Spice powders ( Chilly powder, turmeric, coriander powder, salt)
A little milk
Butter for garnish
Cooking oil

How to Proceed:


Chop vegetables in smaller pcs. I have taken baby corn and capsicum. you could do what you have or want.


In a grinder grind tomatoes with chilly, garlic pods and ginger. Keep the puree aside.
Heat oil in a pan and add tempering. fry the chopped onions.
Add the pureed Tomato paste and cook .
Add spice powders. you could add a bit of Garam Masala if you wish.
Once the oil separates, add chopped vegetable and cook a little. They should stay crunchy so do not overcook them.
Add Grated paneer now and stir.


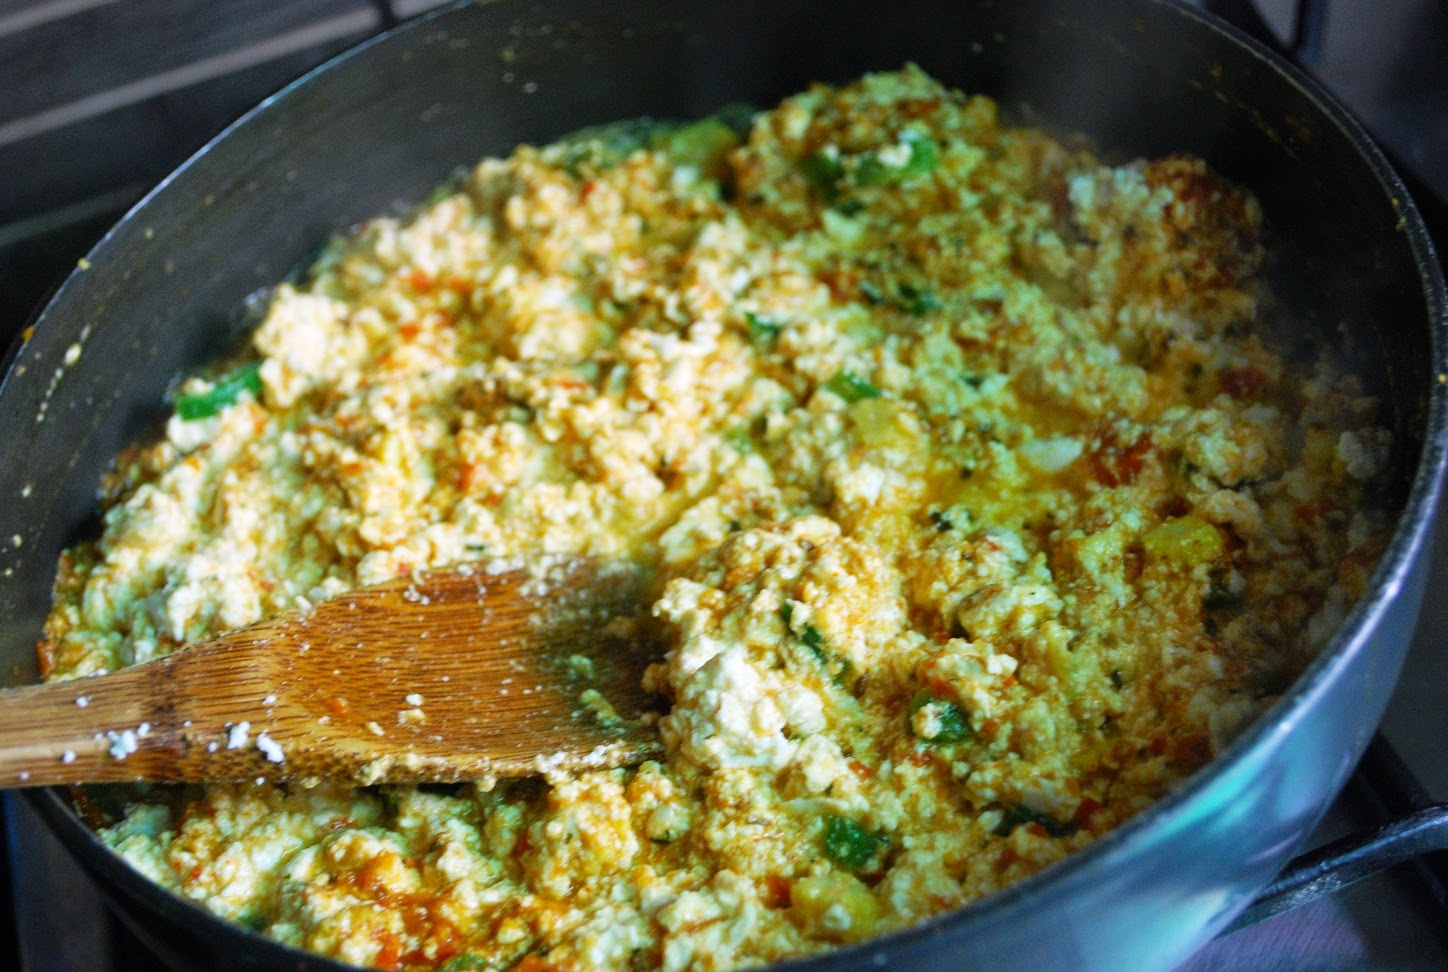
In case the mixture is too thick add just a little bit milk. May be a tablespoon or so. You could skip it if you wish.
Transfer the cooked Paneer to a glass Heat proof glass dish.


Dot the paneer with butter. The dish is now ready to go into an oven.
Set the oven tray to topmost rack so that the paneer gets cooked crispy from top.
Preheat oven at 200*C for 5-10 min.
You must bake the dish only when ready to serve as it should be crispy when served.
Bake for about 10-15 minutes till the upper crust looks crisp and brown. I leave that your taste how crunchy you would prefer.
Serve Hot.


Sunday, March 29, 2015

Hyderabadi Dum ki Machchli

I must confess I am a vegetarian. But for the love of a husband who loves his fish I have learnt how to cook it. I find cooking fish easiest since it requires very little time and mostly does not need elaborate recipes. I am using fresh water fish here. The Local fish is called "Katla" and is abundant in lakes in Rajasthan particularly Jaisamand lake.
This recipe has been adapted from a wonderful cookbook "Hyderabadi Cuisine" by Pratibha Karan. Interestingly she is a Vegetarian too with great non vegetarian recipes in her book. :)
One main ingredient that adds flavour to the dish is Watermelon & Muskmelon seeds. They are easily available in supermarkets and shops. Popularly called Khabooja & Tarbooj dried seeds. They are soft and can be crushed fresh using a pestle & mortar.


You need:
1/2 kg Fish cut into slices

To be ground into a paste

2 medium onions
1 tsp Ginger Garlic Paste
3-4 green chillies ( add more for more heat)

1- 1/2 cup yogurt ( thick)
oil for cooking
1/4 tsp turmeric powder
1 tablespoon ground seeds of watermelon & musk melon seeds
Salt to taste

Tempering
1/2 Tsp caraway seeds ( shahi jeera)
1/2" cinnamon stick
4 cloves

How to make:
Wash fish and pat dry. keep aside.


Paste Onion, Ginger ,Garlic & chillies.


Heat Oil, Add Tempering . Add Onion Paste to it and fry well.


Add salt , turmeric to it and fry . Add whisked Yogurt to it. Make sure the heat is turned down while adding yogurt or it separates.


Meanwhile crush Watermelon & Musk melon seeds.


Add fish and the crushed seeds to the pan. and simmer for about 12-15 minutes till fish starts to flake.
It should be cooked but not overcooked.


Can be served with rice . Garnish with coriander if you wish. The fish tastes best if it is cooked slightly in advance may be 2-3 hours . The flavours seep in the fish much better. You could re heat and serve hot. :)


Thursday, August 8, 2013

Apple Cake

Apple Cake


            On a recent holiday to Kesroli palace fort in Alwar , I ate one of the most delicious coffee cakes. The flavours were so subtle that despite being a baker myself I had to ask the chef " what is it that I can feel but not pinpoint in it?" To my surprise the magical element was Grated Apple.. Yes!! and it tasted divine.
With apple season round the corner I decided to try  adding apple to one of my favorite basic cake recipes.. and Bingo! the cake was so delicious that it was eaten in a day..:P
I don't know much about varieties of apple. Nor do i care. they just needed to be juicy nd fresh. I used Shimla apples that have just started flooding the market.
here's the super Tasty easy Apple cake  for every1.

You need

125 gms Maida
125 gms castor or regular Sugar
100 gms Butter ( I use Amul/salted for this one)
2 eggs
1 tsp vanilla extract
1/2 tsp baking powder
few drops of lemon extract or lemon juice
1 apple peeled and grated.
pinch of powdered cinnamon 
pinch of nutmeg

How to make

1) Pre heat oven at 180 degrees. Dust a baking pan or  line with parchment paper.
2) In a large bowl mix Eggs, Sugar & Butter till fluffy. 
3) Add vanilla, lemon extract, Cinnamon and Nutmeg.
4) Mix the baking powder and flour. add flour to the butter mixture.
5) Peel and grate a large apple. And quickly add to the batter before it oxidizes.
6) Mix gently and pour in the prepared tin.
7) Bake for 40 minutes at 180 degrees Celsius.
And the delicious cake is ready to consume.. :P


Tuesday, February 19, 2013

      Wholewheat Bread Loafs


          Baking breads at home can be  fun really.. But it is something that comes with practice. Do Not get disheartened with the first few disasters. I had at least 4-5 of them till i found the perfect recipe and perfected the process. this recipe is specially for my friend Namrata.. hope you enjoy making this one as much as i do.

      
After a couple of disasters I realised in order to make a bread at home there can never be 100% wheat flour. I have been using a cheat code where I use wheat flour and all purpose flour( maida) in 3:1 ratio. That way the bread rises better. Also the quality of yeast is very important. I have been using this particular one and it very good. mainly coz the yeast granules are very fine. they dissolve better and leave no after taste.
A lot is said about water quantity. Trust me there is nothing like a rule. Every flour quality needs its own quantity of water. So adjust it as per yours. I guess kneading is much easier for Indians since we have better experience & practice. :)
also in case you don't have enough warmth for the dough to rise. there is an easier way out by warming the oven at the lowest like 50 degrees C. And keeping the bowl inside in the warm draft free space for rising. It rises better and faster.

The ingredients are very simple.

You Need
2 3/4 cups flour ( my way 1 3/4 cup wheat flour + 1 cup Maida)
approx 1 cup water
1/8 cup olive oil
1 tsp salt
1 tbsp sugar
3/4 tbsp active dried yeast

How To -
In about 1/4 cup of Luke warm water add yeast, sugar and 1/2 tsp salt. 
Let it rise in warm corner till it froths. Say about 10-15 min.


In a Bowl or plate mix Flour with olive oil and salt.            


Knead it into a soft dough using hands. This needs a lot of energy and time. The idea is that the dough should become springy when touched. In case u can't do it on your own, call for help.. I prefer letting my Hubby do this hard work ;)  Proof his hands in the picture hehe...


Oil a large bowl and put the Dough Ball in it. Cover it with a cling foil and keep it for rising. In case the weather is not warm keep it in the oven as suggested above.


The rising may take anywhere between 45 minutes to 1 1/2 hour depending on temperature.  It basically should  nearly double in volume. Once done Punch in the centre and collect it as a ball to take out excess air.


Cut the ball into 2 for 2 loaves. Roll out first using some additional flour in a neat square.
Tightly Roll it into a cylindrical shape and seal the ends by pinching.          
Roll it and place it on a Baking tray . Sprinkle some cornmeal on the tray to prevent sticking.


Make slashes if you want using a sharp knife and let the tray rise in warm   draft free space until it doubles in size.


Once double Put them in Pre- Heated oven at 200 degrees for 20-25 minutes.


Breads are done when they appear golden and sound hollow when tapped at bottom. A great cheat code I have learnt from a blog is to keep a bowl of water in the oven. the steam from the water keeps the bread crust moist and not dry.  It works.
I also apply olive oil or butter over still warm breads that gives great taste and keeps them moist.
let the breads cool on a wire rack and pack in a bread box.. they are just great with everything specially with Garlic cheese topping.


Sunday, February 10, 2013

Home-made Vanilla Ice - Cream

  Ice-cream is one of most preferred dessert.. Every one I know loves Ice-cream. But very few want to make it at home. Alright, I know the most difficult part is to get the creamy frothy texture of a store bought one. But trust me, it can be easily achieved using an Ice cream maker. Mine is a simple one which has a bowl and a motor attached spatula. I just have to freeze the empty bowl in the freezer a day before I want to make an ice-cream. The bowl gets cold and then I can pour in any batter . The consistency is just right.
this particular recipe taken from www.joyofbaking.com is just perfect. I have though altered it since i have reduced the amount of egg yolks and the sugar. but it is Heavenly anyway. In the recipe I have used a vanilla bean . In case you don't have it you can use vanilla extract. Result may not be same but is good enough.

You need
300 ml milk
300 ml fresh cream
4 large egg yolks
160 gms sugar
Vanilla bean or vanilla extract

How to make:
In a pan let the milk boil with the whole vanilla bean. After a boil take out the bean , cut it into half length wise and using back of a knife scrape the seeds. Discard the pods and add seeds to the boiling milk carefully. The seeds add a great look to it.
Simmer milk and add cream to it and let the cream warm . DO NOT boil the milk with cream or it will separate.


In a separate bowl whisk together egg yolks and sugar well.


Carefully add the hot milk and cream mixture into the egg & sugar one. While adding milk constantly stir the mix.
In case you are adding vanilla extract then you can add it at this stage.


Warm the milk nd egg mixture on a Double boiler. Which is a heat proof bowl over a simmering water vessel.
Once the custard is thick enuf to coat the spoon take it off heat.
 let the mixture cool in a refrigerator for 5-6 hours.

Get you Ice -Cream maker ready as per the instructions on its manual.
 slowly pour the batter into it and start the machine. It may take between 20-30 minutes depending on your machine.


You may find the ice-cream soft at this stage. You can freeze it overnite in an air tight container.
Enjoy with hot chocolate syrup or Brownie.. :)

Chocolate Brownie


A Brownie differs from a chocolate cake in several ways.. It has a moist and more crumbly texture.. also ingredients wise it uses more eggs and very little flour. personally I prefer a brownie only with a generous scoop of vanilla ice cream ( the recipe is soon to follow this one.. :D  ) you can add crushed Walnuts to the batter and get a walnut brownie. Alternatively you can add chopped chocolate or chocolate chips to get even more chocolate flavour..
And this is a perfect recipe in case you are a chocolate lover like my sister Bhanu.. she can live on chocolates.. :p
to make you need

150 gms cooking chocolate, dark or semisweet (chopped or in buttons)
1/2 Cup unsalted butter
1    Cup castor sugar ( or normal granulated sugar)
3     Eggs
2     Table spoons cocoa powder
3/4  Cup flour
1/4   tsp salt
1      tsp  vanilla extract

How to make
Dust a 8" square pan or line it with parchment. Pre- heat the oven to 180* C.


In a glass bowl put chopped chocolate and butter.


Melt the chocolate and Butter in a Double boiler. Basically place the heat proof bowl over a simmering pan of water. The chocolate will melt in a few minutes. Take it off heat


Mix cocoa powder and Sugar.
Add the eggs and flour to molten chocolate.
Combine well. Add Vanilla extract and salt.


Pour it in the prepared tin and bake for 25 to 30 minutes.


The Brownie will be moist when you insert a pin. but it is done.. Do not over bake the brownie. It is okay for the surface to crack.


Friday, December 14, 2012

Moist Carrot Cake


 Been planning this post for quite some time.. but cannot procrastinate it further since carrot season is too short for my antics..;). This cake is heavenly moist & the nutmeg cinnamon combination makes it smell yummy.. I have made adjustments to the original recipe given to me by my friend Aparna.. She is one of the most effortless bakers who practically taught me how to bake..:) so here is the moist carrot cake everybody loves..

You Need
2.5 cup flour ( maida)
2 tsp Baking Soda
1/2 tsp salt
1 tsp ground Cinnamon (Dalchini)
1/2 tsp ground Nutmeg (Jaiphal)
3 Eggs
1&3/4 cups Sugar
2/3 cup softened Butter
3 cups shredded Carrot
1/2 cup Orange Juice
Zest of  1 Orange ( chopped or grated orange Rind)
Raisins (optional)

How to :

Mix the dry ingredients that is Flour, Spices, Baking Soda & salt.


In a large bowl whisk butter ,Sugar nd eggs.


Grate roughly 4-5 carrots to get 3 cups of shredded carrots.


Add grated carrots, orange Juice nd orange Rind to the mix.
Add flour mixture to and gently mix.. Do not over mix. The batter
will be moist so don't panic. Add raisins now if adding.


Dust a large Baking Pan  or line with a baking parchment.
It is a fairly large cake.. I have used a 12" square pan.


Bake for 50 minutes at 180*C. Insert a needle to check if done.
ENJOY..!!